Restoring Backups from R1Soft
Applies To: CLOUD VPS DEDICATED Windows BACKUPS
The R1Soft server works by taking a full backup of of every file on the server the first time that it is run and subsequently on each replication, or backup, run the R1Soft server will only backup new files or files that have changed. These changes that are recorded on the backup run are stored in as recovery points. Due to the fact that only the changed or new files are stored at each replication run no data is duplicated and a great deal of space saved.
Each recovery point represents a snapshot of the server at time that it was taken. Therefore, any file, or indeed the entire file system, can be restored to how it was at the time that the backup was taken. The R1Soft server keeps a rolling pool of restore points. This means that once the configured limit of restore points is reached the oldest will be merged, i.e. it's information rolled into the second oldest one, to make way for the new one.
Restore points can be stored for longer periods by creating Archive Points (configured in the backup policy) these are created and removed on a configurable schedule e.g. one created per week, to be retained for a month. Both recovery points and archive points have exactly the same options available to recover data.
There are several ways that data can be retrieved from the R1Soft backup server. These are:
- Downloading the data to your local computer.
- Restoring the data to the server.
- Performing a complete reset of the server to how it was when the backup was performed i.e. a bare metal restore.
- Restoring databases and Exchange instances either to the server or your local computer.
The Backup Manager users can restore entire Device(s) or selected files and folders from any Recovery Point. You can also extract files from a Recovery Point to an off-site server or a local hard disk.
Restoration Process
To restore data in the Backup Manager, follow the instructions below;
Click Protected Machines in the Main Menu to open the Protected Machines screen.
For the protected machine you want to restore, click the corresponding Actions menu and select Open Recovery Points.

The recovery points page has two tabs; Recovery Points and Archive Points, which show a list of available recovery points.
Find a recovery point in the Recovery Points window, click the corresponding Actions menu, and select Browse.
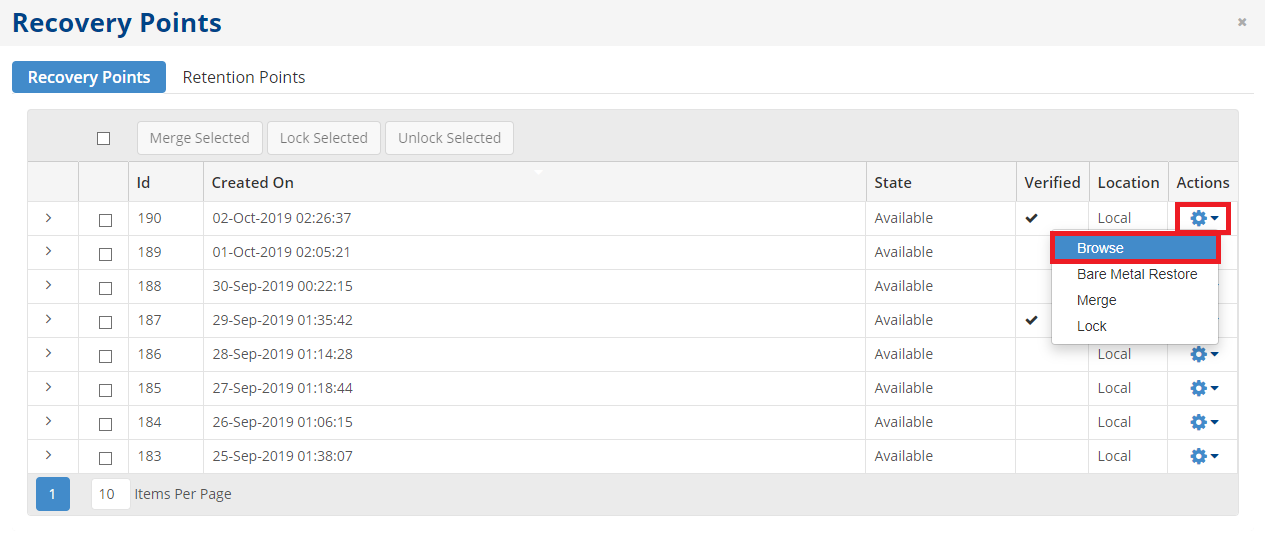
The Browse Recovery Point window displays.
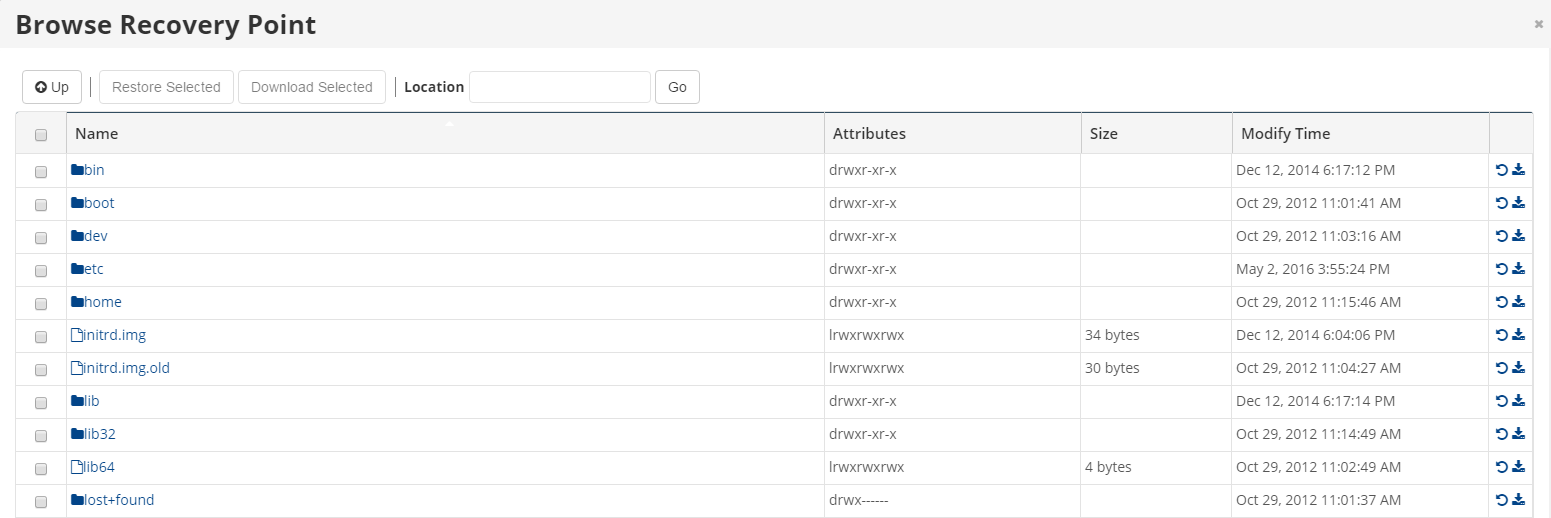
Select the check boxes next to the files and folders you want to restore and click the Restore Selected button.
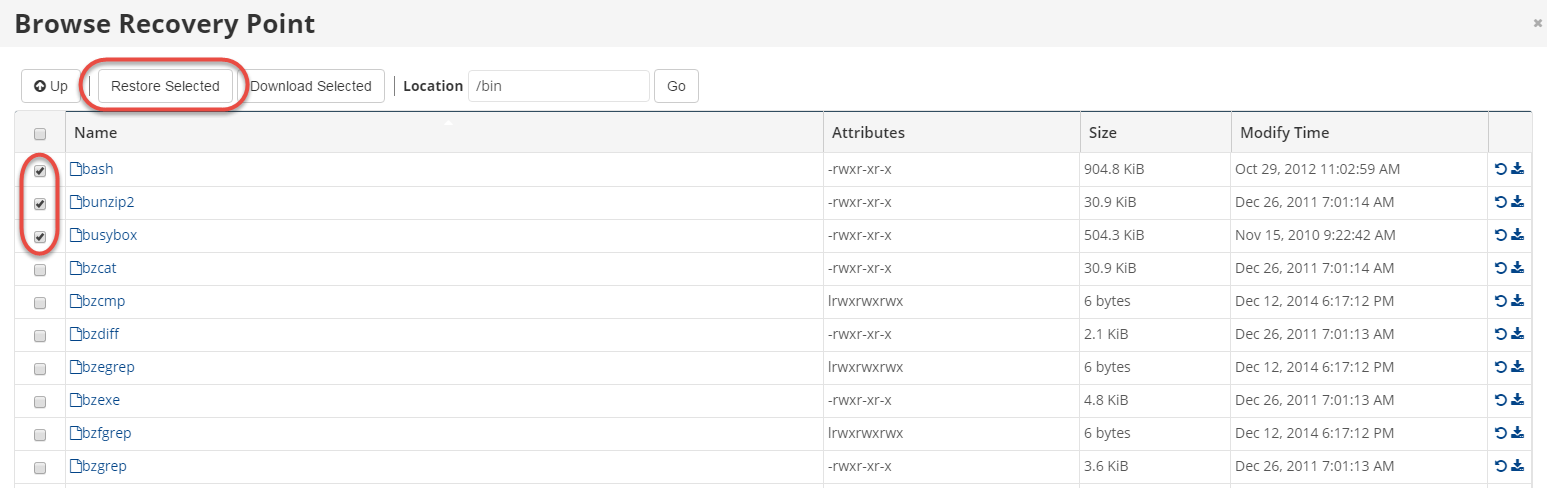
The Restore Files window displays.
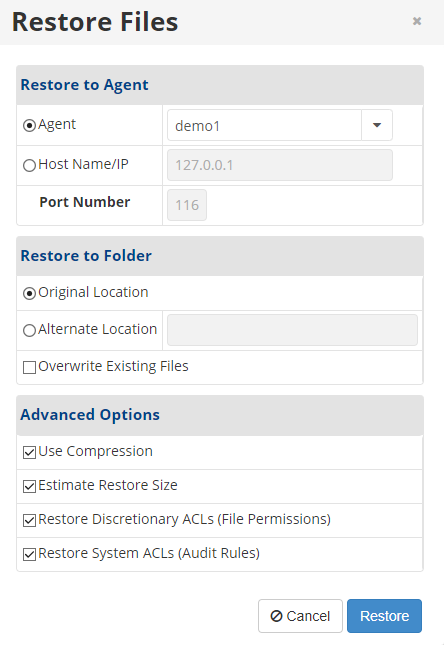
The sections shown in the window are as follows:
Restore to Agent
This is were an alternative server with the R1Soft client can be restored to. However, as a unique R1Soft control panel is supplied for every server this should be left as default.
Restore to Folder
If this is left as default the file or directory will be restored to its original location. The R1Soft server will not overwrite an existing file on the server unless the Overwrite Existing Files box is checked.
Should a different location be required then simply check the box next to Alternate Location and put the full path to the desired directory omitting a final slash e.g. C:\Backups
Advanced Options
- Use Compression - Compression works under the hood using "QuickLZ". If the compressed size is larger than the uncompressed size, the files are sent uncompressed.
- Estimate Restore Size - When enabled, you can see the additional "Estimated Restore Size" and "Estimated Object Count" values in the "Reporting" page - "Summary" tab - "Restore Status" area.
Unless there exists a specific requirement then the advanced options should be left as default.
Click the Restore button to restore the files.
Once the file restore is complete, the Details for Restore Files screen automatically displays the following information:

File Restore Summary
This displays a success or failure message, the number of files restored, and the number of files failed (if any).
File Restore Statistics
This displays time of restore, average network ratio, number of restored bytes, and compression ratio.
Bare Metal Restore
This option allows the entire OS and every file on the server to be restored as they were at the time that the recovery point was taken. This option is usually only used in the event of a catastrophic failure.
Data Loss
All data after the recovery point will be irrecoverably lost.It is not possible to perform a bare metal restore without the assistance of a Memset engineer because the server must be booted into a specially prepared live environment containing the R1Soft Bare Metal Restore agent.
Please contact our Techincal Support Team if you require a Bare Metal Restore of your Server.
Restore Databases
This section allows either Microsoft SQL or MySQL databases to be restored to the server.
Find a recovery point in the Recovery Points window, click the corresponding Actions menu, and select "Browse Databases".
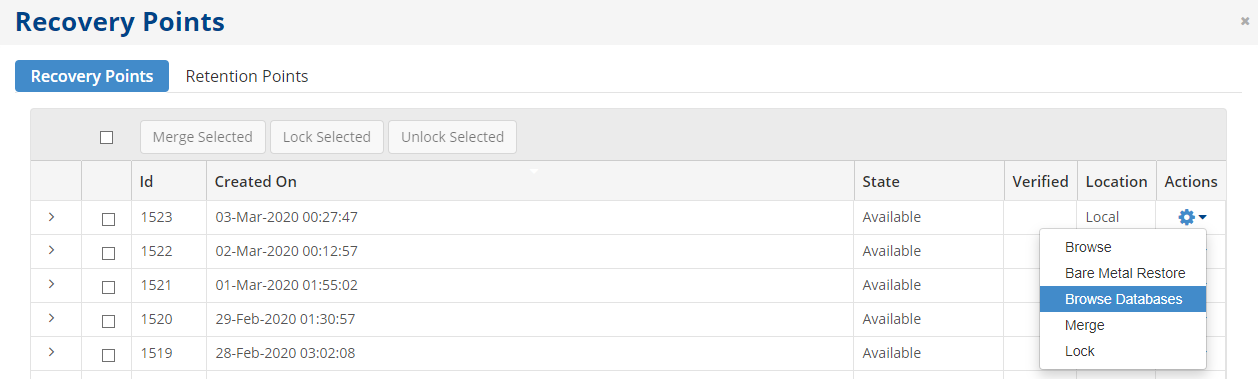
Select "Browse Databases" will open the following dialogue box to select the database:
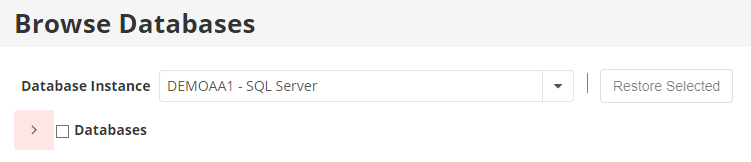
Once the database is selected the Restore Selected button will become available. Clicking on this will open the following dialogue box for restoring the database:

The first page allows an alternate server (the default is the server from the backup was taken) to be selected.
The second page Alternate DB Name allows some custom options to be configured.

This page allows the database to be restored with a different name, and to a new location. In order to use these new setting you need to check the Use Alternative Settings box at the top.
The selected database(s) will be restored when the Restore button is clicked.
Restore Exchange Instances
This procedure is quite lengthy with quite a number of options and is too lengthy to cover here. All of the options and procedures are laid out on the R1Soft website here:
http://wiki.r1soft.com/display/ServerBackupManager/Restore+Microsoft+Exchange